Get ready to be amazed by the incredible science experiments you can do with simple household items! You’ll create mesmerizing lava lamps, reveal secret messages with invisible ink, and witness the explosive power of elephant toothpaste. Discover the secrets of buoyancy with a floating egg, harness the energy of a lemon battery, and experiment with the magical properties of magnetic slime.
You’ll be fascinated by the quirky behavior of cornstarch quicksand, engineer your own bouncy balls, and simulate a volcanic eruption with baking soda. Keep exploring to uncover the mind-blowing possibilities that await you in the world of home science.
Lava Lamp Magic
If you’ve ever been mesmerized by the hypnotic bubbles in a lava lamp, you’ll love this simple science experiment that lets you create your own lava lamp magic at home.
You’ll need a clear plastic bottle, water, vegetable oil, food coloring, and an effervescent tablet like Alka-Seltzer.
First, fill the bottle about 3/4 full with vegetable oil. Then, add water until the bottle is nearly full, leaving a little space at the top.
Add a few drops of your favorite food coloring to the mixture. Finally, break an effervescent tablet into smaller pieces and drop them into the bottle one at a time.
Watch in awe as the tablet pieces react with the water, creating colorful bubbles that rise through the oil and then sink back down, just like a real lava lamp!
The science behind this experiment is simple: the oil and water don’t mix because of their different densities, and the gas released by the effervescent tablet is lighter than both liquids, causing it to rise to the top before the bubbles pop and the gas escapes.
Invisible Ink Messages
Want to send secret messages like a spy?
You can create invisible ink with lemon juice, then reveal the hidden writing by heating the paper or brushing it with a baking soda solution.
It’s a fun way to communicate covertly with friends and family.
Lemon Juice Ink
Secretly send messages to your friends using invisible ink made from lemon juice!
You’ll need a few simple household items: lemon juice, water, a cotton swab, white paper, and a lamp or other light bulb.
Mix equal parts lemon juice and water in a bowl. Dip the cotton swab into the mixture and write your message on the white paper. Let it dry completely; the message will disappear.
To reveal the hidden message, hold the paper close to a light bulb. The heat will cause the lemon juice to oxidize and turn brown, making your secret message visible!
The science behind this experiment lies in the organic compounds found in lemon juice. When exposed to heat, these compounds react with the air and oxidize, changing color. The reaction is invisible until the heat is applied, making it the perfect method for sending secret messages.
Try experimenting with different ratios of lemon juice and water, or even other acidic liquids like vinegar or orange juice. You can create your own spy codes and have fun exchanging covert messages with your friends!
Baking Soda Reveal
Another fun invisible ink experiment uses baking soda and water. Mix equal parts baking soda and water until the baking soda dissolves. Dip a paintbrush, cotton swab, or toothpick into the mixture and write your secret message on white paper. Let the “ink” dry completely. It’ll become invisible once dry.
To reveal the hidden message, you’ll need grape juice concentrate or any dark juice. Pour some juice into a shallow dish and dip a paintbrush or sponge into it. Gently paint over the paper with the invisible message. The baking soda will react with the acid in the juice, causing your secret writing to change color and become visible!
This chemical reaction occurs because baking soda is a base, and grape juice is an acid. When they interact, they neutralize each other and create a color change.
Experiment with different acidic juices to see which works best for revealing your invisible ink messages. You can even try making your own pH indicator using red cabbage juice to test the acidity of various liquids and reveal hidden baking soda messages.
Secret Spy Communication
Elevate your invisible ink experiments to the next level with these secret spy communication techniques.
Combine 1/4 cup baking soda with 1/4 cup water to create your invisible ink solution. Use a cotton swab or paintbrush to write your message on white paper, allowing it to dry completely. To reveal the hidden message, paint over the paper with grape juice concentrate or a mixture of 1/4 cup rubbing alcohol and 1 tsp turmeric. Watch in amazement as your secret communication appears before your eyes!
For an even more discreet method, try using a white crayon to write your message on white paper. To uncover the hidden text, paint over the paper with watercolor paints. The waxy crayon resists the paint, making your message visible.
Experiment with different liquids like vinegar, lemon juice, or milk as invisible inks, and explore various revealing agents such as heat from a light bulb, iodine solution, or even red cabbage juice.
With these secret spy communication techniques, you’ll be sending and decoding covert messages like a pro in no time!
Elephant Toothpaste Eruption

To make your own elephant toothpaste eruption, you’ll need a few basic materials from around the house.
Once you’ve gathered your supplies, follow the step-by-step instructions to create an impressive chemical reaction.
You’ll be amazed at the foamy results!
Materials Needed
You’ll need a few key ingredients to create the incredible Elephant Toothpaste Eruption. First, grab a 16 oz plastic bottle to serve as the reaction vessel.
You’ll also need 1/2 cup of 6% hydrogen peroxide solution, which you can find at beauty supply stores. If you can’t find 6%, 3% hydrogen peroxide from the drugstore will work, but the reaction will be less dramatic.
Next, you’ll need 1 tbsp of liquid dish soap, 1 tbsp of active dry yeast, 3 tbsp of warm water, and food coloring (optional). The dish soap helps create the foamy texture, while the yeast acts as a catalyst to rapidly decompose the hydrogen peroxide into water and oxygen gas. The oxygen gas gets trapped by the soap, forming the “toothpaste” that erupts from the bottle.
Lastly, gather a small cup, a funnel, and a tray or baking dish to catch the mess. With these materials ready, you’re set to conduct the Elephant Toothpaste Eruption and witness the awe-inspiring foamy cascade!
Experiment Steps
Now that you have all the materials ready, let’s get started with the Elephant Toothpaste Eruption experiment!
First, pour 1/2 cup of hydrogen peroxide into the plastic bottle. Add a few drops of food coloring for a vibrant effect.
In a separate cup, mix 1 tablespoon of liquid dish soap with 1 tablespoon of warm water, then pour this mixture into the bottle containing the hydrogen peroxide.
In another cup, mix 1 tablespoon of yeast with 2 tablespoons of warm water. Stir until the yeast is dissolved.
When you’re ready for the eruption, quickly pour the yeast mixture into the plastic bottle and step back.
Watch as the reaction rapidly creates a massive, colorful foam that oozes out of the bottle like toothpaste squeezed from a giant tube!
The foam is safe to touch, but it’s best to do this experiment outdoors or in a sink for easy cleanup.
Observe the fascinating chemical reaction and discuss the science behind it with your friends or family.
Have fun exploring the wonders of chemistry with this exciting experiment!
Floating Egg Experiment
Have you ever wondered why some objects float while others sink? With the Floating Egg Experiment, you’ll discover the science behind buoyancy and density using everyday household items. You’ll need a raw egg, a tall glass, water, and salt.
First, fill the glass about three-quarters full with water. Gently place the egg into the water and observe what happens. You’ll see that the egg sinks to the bottom.
Now, remove the egg and add about 6 tablespoons of salt to the water, stirring until it dissolves completely.
Place the egg back into the glass. You’ll be amazed to see that it now floats! The salt has increased the water’s density, making it denser than the egg. Objects float when they’re less dense than the liquid they’re in.
Try experimenting with different amounts of salt to see how it affects the egg’s buoyancy. You can also test other objects to determine their density relative to water.
This simple experiment demonstrates the fascinating interplay between density and buoyancy, key concepts in understanding the behavior of objects in liquids.
DIY Lemon Battery
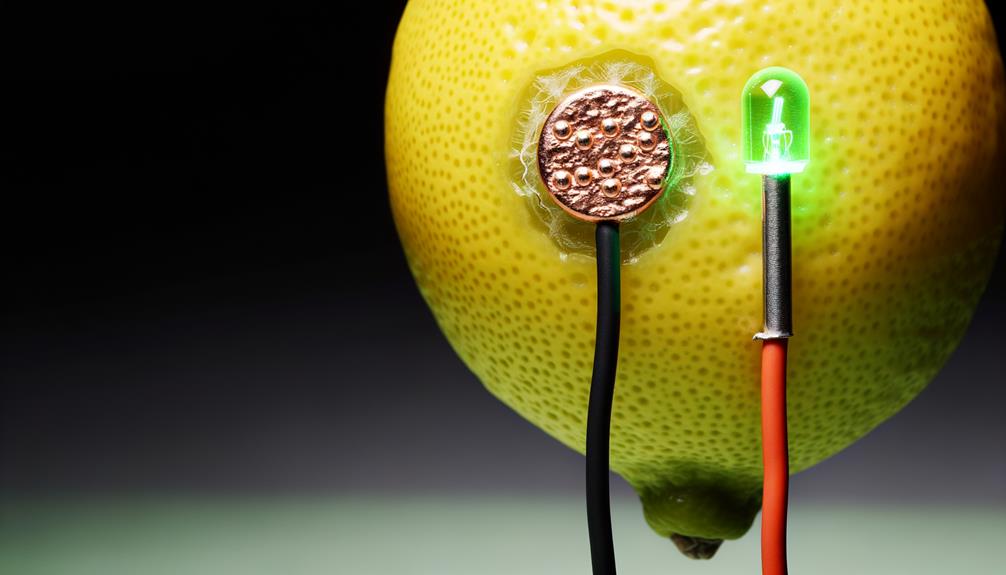
Discover the power of electrolytes with this simple DIY Lemon Battery experiment! You’ll need a lemon, two different metal objects (like a copper coin and a zinc nail), and a small LED light or multimeter.
First, roll the lemon on a hard surface to soften it up, then make two small cuts in the fruit about an inch apart. Insert the copper coin into one cut and the zinc nail into the other, ensuring they don’t touch each other inside the lemon.
Now, use alligator clip wires or regular wires to connect the positive end of your LED light or multimeter to the copper coin, and the negative end to the zinc nail. If using an LED, you should see it light up! If using a multimeter, you’ll measure a small voltage, typically between 0.9 and 1.0 volts.
The lemon’s citric acid acts as an electrolyte, allowing electrons to flow between the two metals, creating a small electrical current. Experiment with different fruits, more lemons in series, or other metal combinations to compare the voltage produced by your natural batteries!
Walking Water Rainbow
Create a stunning, colorful display while exploring capillary action with the mesmerizing Walking Water Rainbow experiment. You’ll be amazed as vibrant colors seemingly defy gravity and mix before your eyes. To set up this enchanting science demo, you’ll need:
| Item | Quantity |
|---|---|
| Clear plastic cups or glasses | 6 |
| Paper towels | 6 |
| Water | 3 cups |
| Food coloring | 3 colors |
| Scissors | 1 pair |
Begin by arranging the cups in a circle, alternating empty and water-filled cups. Add a different food coloring to each water cup. Next, fold the paper towels into strips and trim them to size. Submerge one end of a strip into a colored water cup and drape the other end into an adjacent empty cup. Repeat this process, connecting all the cups. Watch in wonder as the colored water gradually travels up the paper towel “bridges” and into the empty cups, creating a spectacular rainbow effect. The water moves through the tiny gaps in the paper towels due to capillary action, defying gravity in this eye-catching experiment.
Magnetic Slime Adventure
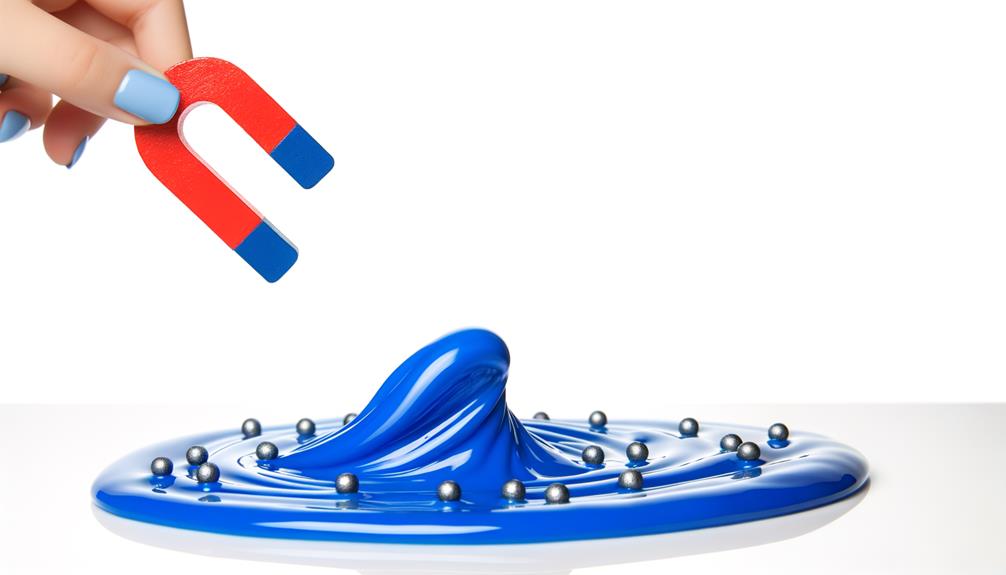
You’ll need just a few household ingredients to create your own magnetic slime.
Once you’ve mixed up a batch of the oozy, gooey substance, you can use magnets to manipulate and play with it.
Get ready for a hands-on adventure that’s sure to captivate any curious mind!
Slime Ingredients
To make your own magnetic slime, you’ll need just a few key ingredients. Gather white glue, liquid starch, iron oxide powder, and a strong neodymium magnet.
Mix 1/4 cup of white glue with 1 tablespoon of iron oxide powder in a bowl until well combined. In a separate container, pour 1/8 cup of liquid starch.
Slowly add the glue mixture to the starch, stirring constantly. As you stir, the slime will start to form. Once it becomes difficult to stir, use your hands to knead the slime until it reaches a smooth consistency.
If it’s too sticky, add a bit more starch; if it’s too runny, add a little more glue.
Now, hold the neodymium magnet near your magnetic slime and watch as it stretches and moves towards the magnet! Experiment with different shapes and movements to see how the slime reacts.
You can store your magnetic slime in an airtight container for future play. Just remember to keep it away from electronics and other magnets when not in use, as the iron oxide can be attracted to them.
Magnetic Manipulation
Now that you’ve created your own magnetic slime, it’s time to explore the fascinating world of magnetic manipulation! Grab a strong magnet and observe how it interacts with your slime. You’ll notice the slime being attracted to the magnet, stretching and morphing as you move the magnet around. This is due to the iron oxide particles embedded in the slime, which respond to the magnetic field.
Experiment with different magnets and see how the strength and size affect the slime’s behavior. Try using a neodymium magnet for an even more dramatic effect.
You can also place objects like paperclips or small metal toys inside the slime and use the magnet to manipulate them from the outside.
Get creative with your magnetic slime by shaping it into various forms and using the magnet to animate them. Make a slime creature that dances to the magnet’s movements or create a magnetic slime maze and guide a metal ball through it.
The possibilities are endless! With magnetic manipulation, you’ll discover a whole new dimension to your slime play and learn about the incredible power of magnets.
Cornstarch Quicksand Phenomenon
Discover the mesmerizing properties of a non-Newtonian fluid by mixing cornstarch and water to create your own “quicksand.” This simple experiment demonstrates how a substance can behave like both a liquid and a solid, depending on the force applied.
| Ingredients | Instructions |
|---|---|
| 1 cup cornstarch | Pour cornstarch into a bowl |
| 1/2 cup water | Slowly add water and stir |
As you mix the ingredients, you’ll notice that the substance feels solid when you apply sudden pressure, but it flows like a liquid when you move your hand slowly through it. This unique behavior is due to the cornstarch particles temporarily locking together under stress, creating a solid-like structure.
Try punching the surface quickly or walking across a large tray filled with the mixture. You’ll experience the “quicksand” effect as the substance solidifies under the rapid force. Experiment with different ratios of cornstarch and water to observe changes in the fluid’s properties. This engaging demonstration showcases the fascinating world of non-Newtonian fluids and their unique characteristics, enchanting both children and adults alike.
Homemade Bouncy Balls
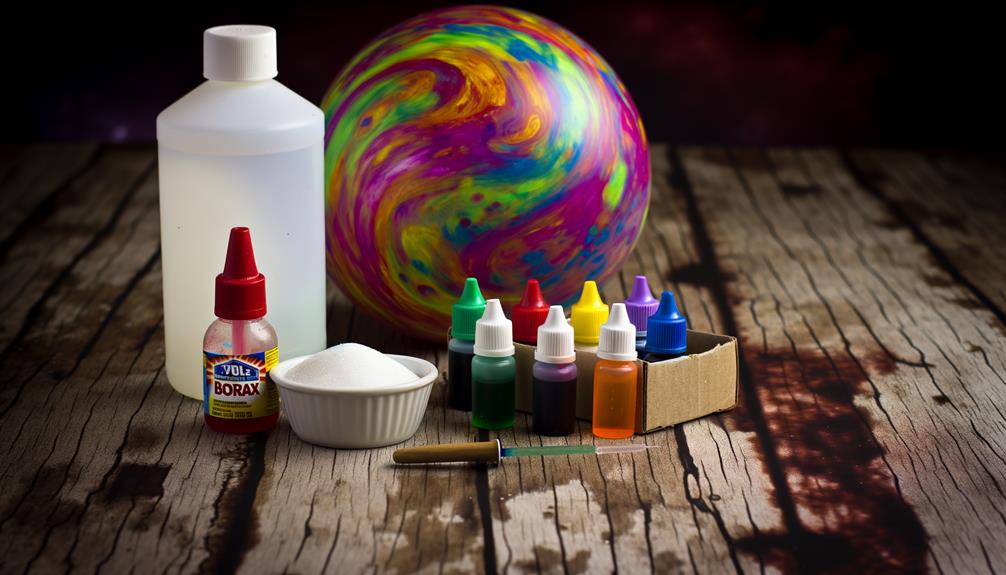
You’ll be amazed at how easy it’s to create your own bouncy balls using common household ingredients.
You’ll need white glue, borax, cornstarch, warm water, and food coloring (optional). In a bowl, mix 1 tablespoon of borax with 2 tablespoons of warm water until dissolved.
In another bowl, combine 1/2 cup of white glue, 1/4 cup of cornstarch, and 2 tablespoons of the borax solution. Mix until a slime forms, then knead it with your hands until it’s no longer sticky.
Roll the mixture into a ball, and voila! You’ve created a bouncy ball.
Experiment with different ratios of ingredients to achieve varying levels of bounciness and texture. You can even add a few drops of food coloring to the glue mixture for colorful balls.
Store your homemade bouncy balls in an airtight container to keep them fresh and ready for play.
This simple DIY project is a fun way to explore the properties of polymers and elasticity, all while creating a toy you can enjoy for hours on end.
Baking Soda Volcano Spectacle
Ready for another exciting experiment? You’re going to love this classic baking soda volcano spectacle! It’s a thrilling demonstration of an acid-base reaction. Here’s what you’ll need: baking soda, vinegar, dish soap, food coloring, a water bottle, and a tray.
First, place the bottle on the tray and pour in 4 tablespoons of baking soda. In a separate cup, mix 1/2 cup of vinegar, a squirt of dish soap, and a few drops of food coloring. When you’re ready, pour this mixture into the bottle and watch the magic happen!
The vinegar (an acid) reacts with the baking soda (a base), creating carbon dioxide gas. The gas forms bubbles, which are trapped by the dish soap, causing the mixture to foam up and erupt out of the bottle like a volcano!
The food coloring adds a dramatic visual effect to this chemical reaction. Experiment with different amounts of ingredients or colors to create your own unique volcanic eruptions.
This hands-on activity isn’t only entertaining but also teaches you about the fascinating world of chemistry in a safe and engaging way.
Frequently Asked Questions
What Is the Science Behind These Mind-Blowing Experiments?
You’ll be amazed by the science behind these experiments! They demonstrate fundamental principles like density, surface tension, and chemical reactions using everyday items. Get ready to explore the fascinating world of science in your own home!
Are These Experiments Safe for Kids to Perform at Home?
You should carefully supervise kids when performing science experiments at home. Many are safe, but some may involve hazardous materials or procedures. Always prioritize safety and follow instructions closely to avoid potential risks.
How Long Does Each Experiment Take to Set up and Complete?
Most experiments take 10-30 minutes to set up and complete, but some may require a few hours or overnight waiting. You’ll need to read each experiment’s instructions carefully to determine the total time commitment.
What Are Some Common Mistakes to Avoid When Doing These Experiments?
Avoid using the wrong materials or quantities. Don’t skip safety precautions like protective gear. Follow instructions precisely; rushing leads to errors. Carefully record observations for accuracy. Clean up thoroughly when you’re done to prevent accidents.
Can These Experiments Be Adapted for Science Fair Projects or Classroom Demonstrations?
You can adapt these experiments for science fairs or classroom demos. Just make sure you’ve got a clear hypothesis, follow the scientific method, and present your findings in an engaging, easy-to-understand way.
Conclusion
You’ve just explored 10 mind-blowing science experiments that’ll leave you in awe! From creating your own lava lamp to making invisible ink messages, these hands-on activities are perfect for satisfying your curiosity and impressing your friends. Don’t forget the mesmerizing elephant toothpaste eruption and the intriguing floating egg experiment. With a dash of creativity and a sprinkle of scientific wonder, you’re now ready to transform everyday household items into unforgettable science adventures!



Leave a Reply